Tuesday, December 6, 2016

Christmas Blog Hop

Hello and welcome to my blog! If you are following today's Christmas blog hop, I'm your third stop following Lisa at Lisa's Workshop. Your next stop is Stefani at Crop with Stef. Be sure to hop on over to Stefani's blog post when you are done here.

I absolutely adore the new Creative Memories Christmas Past scrapbooking collection and can't wait to get this year's Christmas photos in my Christmas Past Fast2Fab album. Unfortunately I will have to wait until after Christmas! In the mean time, here are two dressed up Christmas Past Fast2Fab layouts that I hope will inspire you to dress up your own F2F pages.


Here's what you'll need to complete both layouts:

Christmas Past Fast2Fab Predesigned Album
Christmas Past Stickers
Christmas Past Paper Pack
Christmas Past Mat Pack
12-Inch Trimmer
Personal Trimmer
Border Maker System with the Evergreen and Snowflake Chain Cartridges
2-Way Corner Rounder
Postage Stamp Place n Punch
Tape Runner, Repositionable Tape Runner and Foam Squares
Black and Brown Pens

Merry Christmas Layout
  1. Using the Border Maker and Snowflake Chain Cartridge, punch two 12" long borders from the music sheet scrapbook paper. Use repositionable tape to adhere borders to layouts as shown. Note: You'll have some residual adhesive on your work table after using the repositionable tape on your border - simply brush it away.
  2. Using the 12-Inch or Personal Trimmer, cut one 2" x 4" rectangle from green dot paper and one 1 3/4" x 3 3/4" rectangle from red dot paper. Trim corners from both with the Corner Rounder, stack and adhere together. Use the brown pen to doodle faux stitching around the edge of red dot paper. Use foam squares to adhere Merry Christmas sticker as shown and adhere to left page.
  3. Using the 12-Inch or Personal Trimmer, cut one 3" x 4" rectangle and one 2 1/2" square from red dot paper. Using the mats from your mat pack, cut one 2 1/2" x 3 1/2" rectangle from a beige mat. Trim the Christmas Bells mat to 2" square.
  4. Adhere beige rectangle to red dot rectangle and Christmas Bells square to red dot square. Use the brown pen to doodle faux stitching as shown. Use Foam Squares to adhere Christmas Tree sticker to rectangle and adhere to left page as shown. Adhere square to right page as shown.
  5. Use the Postage Stamp Place n Punch to punch two postage stamps shapes from green dot paper. Adhere to layout as shown. Use Foam Squares to adhere snowflake and postage stamp stickers shown.
Tis the Season Layout
  1. Using the 12-Inch Trimmer, cut a 1 1/2" x 12" strip from red dot paper. Use the black pen to doodle faux stitching to edges and adhere to left page as shown. Use the Border Maker and Evergreen cartridge to punch a border from green pattern paper. Use repositionable tape to adhere Evergreen border to red dot strip.
  2. Use the 12-Inch Trimmer to trim evergreen tag shown from tags and mats paper. Cut a 2 3/8" x 4 3/8" rectangle from green pattern paper to mat evergreen tag.  Use black pen to create faux stitching around edge of tag as shown. Adhere Tis the Season sticker to tag and adhere matted tag to border as shown. Use Foam Squares to adhere evergreen sticker to tag and corner sticker to the upper left corner of the left page.
  3. Use the Personal Trimmer to cut three 1 3/4" squares from red dot paper and three 1 1/2" squares from green pattern paper. Stack and adhere green squares to red squares. Doodle faux stitching around edge of green squares with black pen and adhere squares to lower right corner of right page as shown.
  4. Use Foam Squares to adhere evergreen sticker to squares as shown. Adhere small snowflake stickers as shown.
So there you go! I'd love to see what you've done with your own Christmas Past Fast2Fab pages! Just visit my Facebook page at https://www.facebook.com/cmcdbrinsley to upload a photo of your layout.

For more information about the Creative Memories products used in today's projects, please visit your advisor's website. Of course, if you don't already have a Creative Memories Advisor, I'd be more than happy to be your personal Creative Memories Advisor. Just visit my website at www.creativememories.com/user/dbrinsley to create an account.

Here is a list of today's blog participants:
Stop 1: Karyn McDermaid-Rolfe at Karyn Crops
Stop 2: Lisa Graham at Lisa's Workshop
Stop 3: Me ----> you are here!
Stop 4: Stefani Jones at Crop With Stef
Stop 5: Fran Smitherman at CelebratingYourBeautifulLife
Stop 6: Noreen Smith at Organized and Creative Mom

Your next stop is Stefani at Crop with Stef.

Hope you have a very Merry Christmas! And don't forget to take a lot of pictures!!


Tuesday, May 31, 2016

Father's Day Blog Hop - Stop 2

Hello and welcome to my blog! If you are following today's Father's Day blog hop, I'm your second stop following Fran at CelebratingYourBeautifulLife. Your next stop is Stefani at Crop with Stef. Be sure to hop on over to Stefani's blog post when you are done here.

Before my dad passed away in 2010 his favorite Father's Day gifts from me were the photo albums I created for him. Sometimes I would create a digital scrapbook album and at other times I would use a small pocket page album. I don't think he really cared what type of album I created, what was most important to him were the pictures in the album. I think he would have liked the mini scrapbook album I've created for today's blog hop - filled with pictures of course!


Ingredients:
Here are the general instructions for creating my mini scrapbook album:
  1. Using the 12-Inch Trimmer cut twelve 4 1/2" x 7" rectangles from brown cardstock.
  2. Using the 2-Way Corner Rounder, round all 4 corners of each rectangle.
  3. Cut one 4 1/2" x 7" rectangle from a contrasting color to use as a template for your hole punch. Round the corners of your template and punch a hole in one corner.
  4. Use your template to punch a hole in each rectangle.
  5. To create cover, cut one 4 1/2" x 7" rectangle from wood look pattern paper. Round corners and use your template to punch a hole in the upper left corner. Adhere to one brown rectangle as shown.
  6. Using the 12-Inch Trimmer, cut one 2" x 4" rectangle from red pattern paper and one 1 1/2" x  3 1/2" rectangle from beige pattern paper. Snip a "V" in one end of each.
  7. Adhere flags to cover as shown. Adhere sticker shown to cover. Use black dual-tip pen to add faux stitching to edge of cover if desired.
  8. Follow the instructions below for creating each scrapbook layout included. Thread completed pages onto a D-ring as shown.


  1. Using the 12-Inch Trimmer, cut one 4 1/2" x 7" rectangle from ledger pattern paper. Round corners and use template to punch a hole in the upper right corner.  Adhere to the other side of your cover as shown.
  2. To create the crown border, use the crown border maker cartridge to punch a crown border from purple pattern paper. Trim to 3/4" x 7 inches. Cut one 1" x 7" strip from beige pattern paper and one 1 1/2" x 7" strip from purple pattern paper. Layer and adhere to inside cover page as shown.
  3. Cut one 4 1/4" x 6 1/4" photo mat from purple pattern paper. Round corners and adhere to facing page as shown. Use a black dual-tip pen to journal your greeting.


 Adhere So Blessed slide-in card to left page. Cut a 4 1/4" x 6 1/4" photo mat from wood look pattern paper. Round corners and adhere to facing page.  

  
Cut one 4 1/4" x 6 1/4" photo mat from pattern paper shown and one from purple pattern paper. Round corners of each and adhere to pages as shown. Cut one 1" x 5 3/4" strip from purple pattern paper. Snip a "V" into one end and adhere to left page as shown. Use the Fall In ABC Stickers to create a title.  


 Cut one 4 1/4" x 6 1/4" photo mat from stripped paper shown and one from purple pattern paper. Round corners and adhere to page as shown. Add sticker to left page as shown.  


  Cut one 4 1/4" x 5 3/4" rectangle and one 4 1/4" x 6 1/4" photo mat from teal pattern paper shown. Round corners of each and adhere to pages as shown. Cut vertical Thankful slide-in card to 3 3/4" x 4" and adhere to left page as shown (set aside what's left of the slide-in card to use on your next layout). Adhere stickers as shown.  

 
Cut one 3 1/2" x 5 1/2" rectangle and one 4 1/4" x 6 1/4" photo mat from plaid pattern paper. Adhere rectangle to left page as shown. Round corners of photo mat and adhere to right page. Turn what was left from the Thankful slide-in card to the purple side and adhere to right page as shown. Adhere Hugs title sticker over the word bubble. Draw a line around the edge of card with a black dual-tip pen and a ruler.


Cut one 4 1/4" x 6 1/4" photo mat from red pattern paper. Round corners and adhere to left page. Adhere slide-in journal card to right page and add sticker shown.


Cut one 4 1/4" x 6 1/4" photo mat from purple cardstock. Adhere to right page. Adhere horizontal word bubble slide-in card to left page. Adhere Thank You title sticker over word bubble.


Cut two 4 1/4" x 6 1/4" photo mats from red cardstock. Round corners and adhere to both pages as shown. Round corners of horizontal This is the Good Stuff  slide-in card and adhere to right page as shown.


Cut one 4" x 5 3/4" rectangle from plaid pattern paper and adhere to left page. Cut one 4 1/4" x 6 1/4" photo mat from purple cardstock and adhere to right page. Cut a strip from red cardstock to measure 1/2" x 5 3/4 inch. Adhere to plaid rectangle as shown. Adhere Happy Day title sticker to left page as shown.


Cut one 4 1/4" x 6 1/4" photo mat from red cardstock and one from grey pattern paper. Adhere both photo mats to pages as shown. Round corners of horizontal My Favorite slide-in card and adhere over red photo mat as shown.

For more information about the Creative Memories products used in today's projects, please visit your advisor's website. Of course, if you don't already have a Creative Memories Advisor, I'd be more than happy to be your personal Creative Memories Advisor. Just visit my website at www.creativememories.com/user/dbrinsley to create an account.

Starting with the Creative Memories Blog, here is a list of today's participants:

Stop 1: Fran Smitherman at CelebratingYourBeautifulLife
Stop 2: me ----> you are here
Stop 3: Stefani Jones at Crop with Stef
Stop 4: Sarah Fitzgerald at ClickWriteShare
Stop 5: Lisa Graham at Lisa's Workshop
Stop 6: Noreen Smith at Organized and Creative Mom

Your next stop is Stefani at Crop with Stef.

Have a good day and thanks so much for visiting my blog!

Monday, April 25, 2016

Mother's Day Blog Hop - Stop 6

Hello and welcome to my blog. I hope you're following today's Mother's Day Blog Hop. I'm your 6th stop following Julie's Creative Memories Blog. You're next stop will be Lisa Graham at Lisa's Workshop. Be sure to hop on over to Lisa's blog when you are finished here for some more fun Mother's Day projects.   

I really think that one of the best gifts you can give anyone just about anytime is a completed scrapbook album. Mother's Day is no exception. And, you can finish your gift album in no time if you choose a Fast2Fab Predesigned Album. Today I'm going to share a scrapbook layout I created using predesigned pages from the Fresh Picks Fast2Fab Album. Here is what I started with: 


 This is the layout I created with Fresh Picks papers and embellishments:


Ingredients:
Instructions:
  1. Use the straight trimmer to cut three 4 1/2" x 6 1/2" photo mats from eggplant pattern paper. Adhere mats to all three 4" x 6" photos.
  2. Use the straight trimmer to cut one 4" x 10" rectangle from light green pattern paper and one    1 1/2" x 9" strip from eggplant pattern paper. Adhere both papers to right side of right page as shown. Adhere photos to both pages as shown.
  3. Use Border Maker and Medallion Frame Chain cartridge to punch one border from eggplant pattern paper and one border from light teal pattern paper. Cut the light teal border to 8 5/8" long and adhere to eggplant strip as shown. Cut the eggplant border to 8" long and adhere to left page as shown.
  4. Adhere embellishments shown. Use black Dual-tip pen to create a title and to journal.   
For more information about the Creative Memories products used in today's projects, please visit your advisor's website. Of course, if you don't already have a Creative Memories Advisor, I'd be more than happy to be your personal Creative Memories Advisor. Just visit my website at www.creativememories.com/user/dbrinsley to create an account.
Starting with the CM Blog, here is a list of today's participants:

Stop 1: Fran Smitherman at CelebratingYourBeautifulLife
Stop 2: Noreen Smith at Organized and Creative Mom
Stop 3: Sarah Fitzgerald at ClickWriteShare
Stop 4: Candace Bouldin at Scrappin' Jpegs
Stop 5: Julie Tambrini at Julie's Creative Memories Blog
Stop 6: me ----> you are here
Stop 7: Lisa Graham at Lisa's Workshop

Your next stop is Lisa Graham at Lisa's Workshop

Have a good day and thanks so much for visiting my blog!


Monday, March 21, 2016

Easter Blog Hop - Stop 5

Hello everyone and welcome to my blog! If you're following today's Easter Blog Hop I'm your fifth stop following Julie's Creative Memories Blog. Your next stop will be Stefani Jones at Crop With Stef. Be sure to hop on over to Stefani's blog post when you're finished here for more fun projects. And when you've visited each of our blogs do make sure you return to the CM Blog and leave a comment. You just might win a Fresh Picks Prize Bundle. Yay!! 

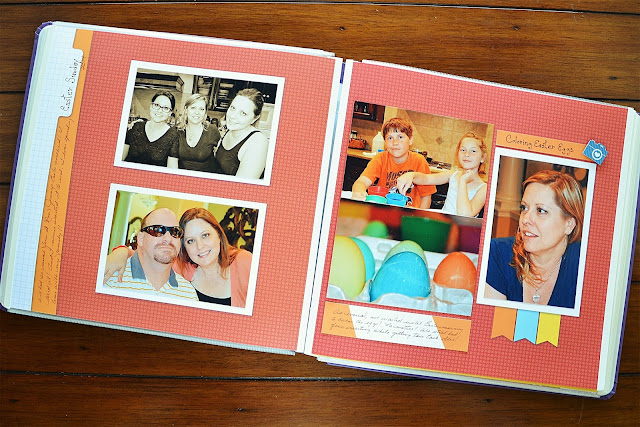
I really enjoy creating scrapbook layouts from scratch but, like many of us, I don't have a lot of time to scrapbook. I find myself turning to Fast2Fab albums more and more these days to help get my pictures into albums. I used the Look On The Bright Side Fast2Fab pages for the pictures I took on Easter Sunday, 2014. Today I'm going to share three of the scrapbook layouts I created with you. 

Layout 1:


Layout 2:


Layout 3:


To create each of these layouts you will need:
Instructions:

Layout 1:
  • For this layout I used the preprinted horizontal photo mats on the left page and the vertical photo mat on the right page as is. I covered one vertical photo mat on the right page with two horizontal photos as shown.
  • To create the journal box, cut a slide-in card to 1 1/4" x 6" and adhere to page as shown.
  • Trim another slide-in card to 3/4" x 6" to create a title mat and adhere to page as shown. Using sharp scissors, fussy cut a camera from slide-in card. Use a foam square to adhere to page.
Layout 2:
  • For each page, cut two horizontal photos to 4 1/2 x 6 inches. Group with two 4" x 6" photos as shown.
  • Use the personal trimmer and sharp scissors to cut "Favorite photos" and the large camera from slide-in cards. Use foam squares to adhere to page as shown.
Layout 3:
  • Adhere photos to the mat-less predesigned pages as shown.
  • Use the personal trimmer to trim the horizontal "Love this" slide-in card to 3 x 4 1/4 inches. Adhere to layout as shown.
  • Use the personal trimmer to cut a 1 1/4" x 4" piece from yellow slide-in card. Use the border maker and chevron cartridge to cut a short 4" border from green paper or slide-in card. Trim as shown. Adhere to yellow piece then to layout as shown.

For more information about the Creative Memories products used in today's projects, please visit your advisor's website. Of course, if you don't already have a Creative Memories Advisor, I'd be more than happy to be your personal Creative Memories Advisor. Just visit my website at www.creativememories.com/user/dbrinsley to create an account.

Starting with the CM Blog, here is a list of blog participants:

Stop 1: Noreen Smith at Organized & Creative Mom
Stop 2: Sarah Fitzgerald at ClickWriteShare
Stop 3: Candace Bouldin at Scrappin' Jpegs
Stop 4: Julie Tambrini at Julie's Creative Memories Blog
Stop 5: Me -----> you are here!
Stop 6: Stefani Jones at Crop With Stef
Stop 7: Lisa Graham at Lisa's Workshop
Stop 8: Fran Smitherman at CelebratingYourBeautifulLife
Final Stop: CM Blog to leave a comment for a chance to win Fresh Picks Prize Bundle. 

Your next stop is Stefani Jones at Crop With Stef. Don't forget to return to the CM Blog to leave a comment. You may be the one lucky person who wins! Good luck and happy blog hopping!
Have a good day and thanks so much for visiting my blog!


Monday, January 18, 2016

Year to Remember Blog Hop - Stop 3

Good morning everyone! I hope you're enjoying our first blog hop of the year! I'm your third stop today following Julie's Creative Memories Blog. Didn't you love Julie's layout ideas? I did for sure! Your next stop is Stefani Jones at Crop With Stef. Be sure to hop on over to Stefani's blog post when you're finished here for more fun projects that I know you're also going to love. And when you've visited each of our blogs do make sure you return to the CM Blog and leave a comment. Just tell us what your favorite thing about the new Year to Remember collection is and you'll be qualified to win the entire collection. Yay!! In the mean time, I'm going to share some project ideas with you.


I am seriously on a border roll here! When I saw the stickers and shapes that coordinate with A Year to Remember papers one of the first things I thought about was borders. So today I'm going to share 3 borders created with the Year to Remember collection.  Then I'll also share some ideas for using borders with the calendar grid pages. 
 
Supplies List - here's what you need to create today's projects:
 
Here are the borders I created with the fun Year to Remember collection. I'll include instructions for each along with an idea for using your borders with a calendar grid page on a two-page layout. These are just a few of the paper and embellishment combinations possible with this collection. Be sure to check out the entire collection here. I know that you are not going to want to miss a chance to win this collection! Just remember to leave a comment on the CM Blog and tell us what your favorite thing about the Year to Remember collection is.


January Border


To Create:
  1. Rip one edge of the multi-colored numbers paper and cut to 2 x 12 inches. Cut green chevron paper to 1/2" x 12 inches and white cardstock to 3/4 x 12 inches. Layer and adhere as shown.
  2. Using the inside track of the large circle pattern and the red blade, cut a circle from white cardstock. With the inside track of the small circle pattern and the blue blade, cut another circle from white cardstock. Adhere the sticker shown to the small circle.
  3. Center the inside track of the small circle pattern over the square green chevron sticker and cut with the green blade.  Leave the backing in place and adhere snowflake sticker to chevron sticker.
  4. Cut a 3/4 x 4 1/2 inch rectangle from green chevron paper. Pinch ends together and snip at an angle to form a "V" on both ends. Adhere January tag to flag as shown. Adhere tag and flag to white circle with foam squares. Use foam squares to adhere arrow and snowflake circle. Adhere your embellished circle to your border strip.
Here's how I used my January Border on a two-page layout:


February Border


To create:
  1. Cut one 2 x 12 inch strip from red cardstock. Tear edge of cloud printed paper and cut to 1 1/4 x 12 inches. Adhere cloud strip to red strip as shown.
  2. Cut one 2 1/2 inch square from red hearts paper. Use the Shape Maker and Square Cartridge to cut a 2 inch square from red chevron paper. Adhere squares to border strips as shown.
  3. Cut red arrow in half and adhere to back of love embellishment shown. Use foam squares to adhere embellishment to squares.
Here's my February layout:


March Border
 
 
To create:
  1. Cut one 2 x 12 inch strip from green and white chevron pattern paper. Turn that paper to the other side and cut one 7/8 x 12 inch dark blue strip. Cut a 1 1/2 x 12 inch strip from green and white polka dot paper. Layer and adhere as shown.
  2. Cut one 2 1/2 inch square from green and white chevron paper. Using the shape maker and square cartridge, cut a 2 inch square from dark blue pattern paper. Layer squares as shown and adhere to border strip.
  3. Attach the light green and burgundy flags to underside of the hello embellishment shown (making sure to hide the numbers on the end of the flags). Use foam squares to attach embellishment to squares.  
Finally, here's my March layout:


For more information about the Creative Memories products used in today's projects, please visit your advisor's website. Of course, if you don't already have a Creative Memories Advisor, I'd be more than happy to be your personal Creative Memories Advisor. Just visit my website at www.creativememories.com/user/dbrinsley to create an account.

Starting with the CM Blog, here's a list of today's Blog Hop participants:
 
Stop 1: Candace Bouldin at Scrappin' Jpegs
Stop 2: Julie Tambrini at Julie's Creative Memories Blog
Stop 3: Me ====> you are here!
Stop 4: Stefani Jones at Crop with Stef
Stop 5: Lisa Graham at Lisa's Workshop
Stop 6: Noreen Smith at Organized & Creative Mom
Stop 7: Sarah Fitzgerald at Click Write Share
Final Stop: CM Blog
 
Your next stop is Stefani's blog at Crop with Stef. Don't forget to return to the CM Blog to leave a comment. Tell us what you like the most about the Year to Remember collection and you may be the one person who wins the entire collection! Good luck and happy blog hopping!  

Have a good day and thanks so much for visiting my blog!